Starting a new Scan
Starting a new Scan
There are three ways to Scan Inventories :
- Scanning Profiles previously Added to the Application
- Scanning URLs
- Scanning Cached Data file created by Steam Inventory Scanner
Scanning Profiles
Clicking on the Scan button within the Main Window Initiates a new Scan that will Scan all profiles that you have previously added to the program.
In order to Initiate this Scan, a Steam Profile must first be added to the database and marked for Scanning. Steam Profiles will be Saved for Future Sessions.
How to add a new Profile to the Application
Click Scan.
Scanning URLs
Similar to how Scanning Profile Works, this option does the same but it doesn't require the creation of Profiles within the Application. Simply provide one or more URLs or SteamID64s and the Application will Scan them and show results.
To Scan URLs
- Within the Main Window Click File Menu
- Click Scan URLs
- A New Window Appears, paste URLs or SteamID64 - one per line and click Scan
Supported Format
- Scan URLs window will only accept Old Endpoint Inventory URLs and SteamID64, which will use the new EndPoint.
- Paste one URL or Steam ID per line
- URLs must be in format : https://steamcommunity.com/id/PROFILEUSERNAME/
- Or in format : https://steamcommunity.com/id/PROFILEUSERNAME/inventory/
- For SteamID64, just copy the SteamID64 in a new line.
Example : 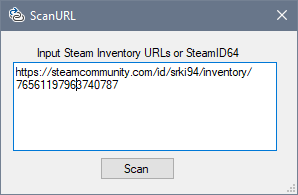
Scanning Cached Data File
Finally, if you have Previously Saved Scan Result via Steam Inventory Scanner, you can load this file Directly to the List.
To Scan Cached Data
- Within the Main Window Click File Menu
- Click Scan File
- Select a valid Cache file previously Created by Steam Inventory Scanner
- Click Open
Once the Scan is complete, the data will be shown within the List in the Main Window.